Technical Fundamentals
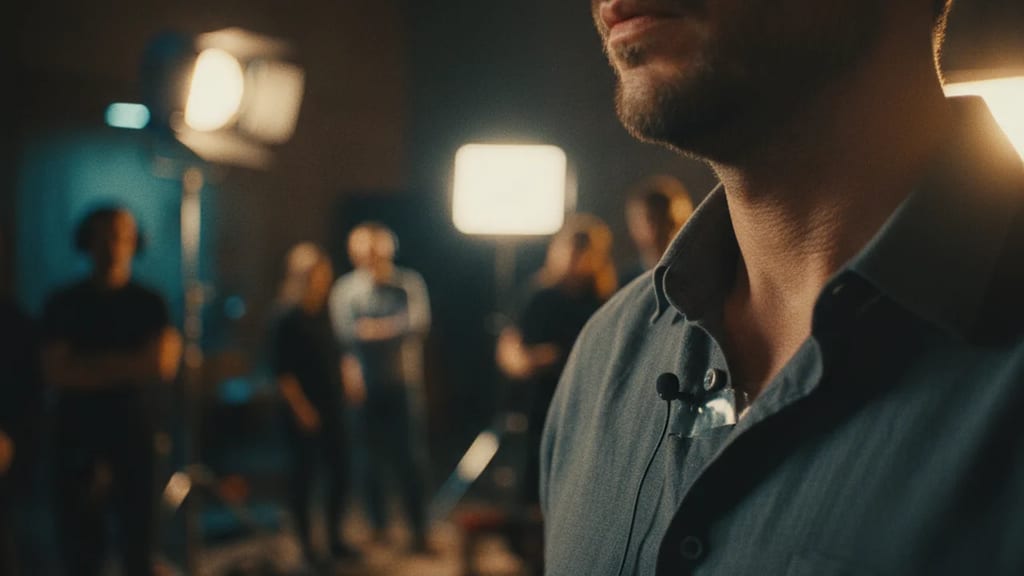
A lavalier microphone (also called "lav", "body mic", or "wireless mic") is a small, lightweight clip-on microphone that is attached directly to the actor's body. Unlike a boom mic, which captures sound from a distance, the lavalier sits close to the mouth (typically 10-20 cm below the chin) and primarily captures the wearer's voice.
Typical Lavalier Specifications
| Property | Standard Value | Remark |
|---|
| Size | 3-6 mm diameter, 2-3 cm length | Discreet, can be hidden in clothing |
| Weight | 1-3 g (capsule only) | Barely noticeable for actors |
| Frequency Response | 50 Hz - 16 kHz | Optimized for human voice (not bass) |
| Pickup Pattern | Omnidirectional or Cardioid | Omnidirectional captures more ambient sound |
| Sensitivity | -35 to -42 dBV/Pa | Typically lower than boom mics |
| Maximum SPL | 130+ dB SPL | Can handle loud shouts |
| Self-Noise | 20-30 dB-A | Slightly higher than boom (acceptable close to mouth) |
| Cable Weight | Fine nylon/plastic, 1-2 mm | Barely visible under clothing |
Wireless Technology for Lavaliers
The lavalier system consists of three components:
- Transmitter (worn by the actor)
- Frequency: typically 1.9-2.4 GHz (ISM band, license-free in EU/USA)
- Transmission Power: 50-100 mW
- Battery: AA/AAA, runtime 6-12 hours
- Weight: 100-200 g (small enough to be hidden in a pocket)
- Examples: Sennheiser EW 500 Series, Shure ULXD, Audio-Technica 3000 Series
- Receiver (with the sound mixer)
- Range: typically 100-300 m (depending on environment)
- Multiple channels possible (mono or stereo, depending on the number of lav mics)
- Power Supply: AC adapter or batteries
- Display: Shows frequency, signal strength, battery status
- Antenna
- Whip antennas (practical) or helix antenna (better for range)
- Positioning: Elevated at the mixer's location
Frequency Response and Characteristics
A typical lavalier microphone has a shaped frequency response to provide optimal dialogue quality:
- 50-100 Hz: Reduced (high-pass filter to minimize body noise)
- 100-250 Hz: Flat (fundamental voice range for deep voices)
- 250-2 kHz: Slightly boosted (presence, intelligibility)
- 2-5 kHz: Moderate boost (sibilance region)
- 5+ kHz: Reduced (less "air", but also less sibilance)
This presence peak is intentional: a lavalier needs to sound aggressive to leverage its proximity to the source.
Practical Setup and Placement
Where is the Lavalier Placed?
Standard Position:
- 10-20 cm below the chin, on clothing (chest/shirt)
- Angle: Slightly angled upwards towards the mouth (45 degrees)
- Distance from Mouth: 15-25 cm (closer = more proximity effect, louder; further = more room tone)
Alternative Positions (depending on the scene):
- Tie or Sweater: More discreet, but further from the mouth
- Under the shirt on the chest: Very hidden, but muffled (only for special scenes)
- Lapel of a Jacket: Classic, visible but acceptable
- Shoulder under jacket: For action, when proximity to the mouth is unimportant
Cable Routing
The thin lavalier cable needs to be routed from the microphone to the transmitter:
- Clothing Integration: The cable is hidden inside the clothing
- Transmitter Position: Typically in the back pocket of trousers or attached to the hip (with a clip)
- Cable Securing: Attached to the actor's body with small pieces of tape or Velcro to minimize movement noise
- Testing: Test for cable friction noise before recording
Windscreen and Pop Filter
Since the lavalier is close to the mouth, it needs protection:
- Windscreen: Small foam cap around the microphone (reduces plosives and breath sounds)
- Pop Filter: Sometimes an additional mesh cover
- Material: Fine nylon or mesh, barely visible even up close
Common Problems and Solutions
| Problem | Audible Result | Cause | Solution |
|---|
| Clothing Noise ("Rustling") | Scratchy noise with movement | Cable rubbing against clothing, or lav moving | Secure cable with tape/Velcro, use windscreen |
| Cable Clicking ("Handling Noise") | Clicking sounds with movement | Transmitter moving in pocket | Secure transmitter in a rigid holder, not loose |
| Proximity Effect (Bass Boom) | Muffled, bass-heavy voice | Microphone too close to mouth | Position 5-10 cm further away, or apply EQ later |
| Sound Too Quiet | Whispers barely audible | Weak transmitter or lavalier too far away | Check transmitter battery, move microphone closer |
| Radio Interference ("Dropouts") | Short interruptions, "glitch" sounds | RF interference or poor range | Reposition antenna, change frequency, move receiver closer |
| Overload on Loud Dialogues | Distorted, strained-sounding voice | Transmitter input level too high | Reduce transmitter input level |
| Voice Sounds "Thin" and High | Incorrect pitch, unnatural | Incorrect crossover or lack of bass | EQ adjustment in post-production, or position closer |
Equipment Standard for Lavalier Systems
Professional Wireless Systems
Sennheiser EW 500 Series (Industry Standard)
- Frequency Range: UHF (600-700 MHz or 1.9-2.3 GHz)
- Range: up to 250 m
- Price: €2000-€4000 per channel
Shure ULXD Wireless (Premium, digital transmission)
- Frequency: Digital, 1.9 GHz band
- Range: up to 300 m
- Latency: under 2 ms (imperative for live applications)
- Price: €3000-€5000 per channel
Audio-Technica 3000 Series (More affordable, solid)
- Frequency: UHF, many channels available
- Range: up to 200 m
- Price: €1500-€3000 per channel
Lavalier Capsules (Microphones)
Sennheiser MKE 2 (Omnidirectional, neutral)
- Price: €100-€200
- Frequency Response: 50-16 kHz
- Good for natural voice
Shure WL93 (Cardioid, aggressive)
- Price: €150-€250
- Frequency Response: 50-20 kHz
- More presence, less room tone
Audio-Technica AT831cW (Condenser, modern)
- Price: €200-€300
- Good for wide dynamic range processing
Accessories
- Batteries: AA/AAA Alkaline or NiMH Rechargeable
- Tape: Gaff tape or Velcro for securing
- Cable Organizers: For managing wireless signals at the mixer
- Antenna Splitters: For connecting multiple receivers to a central antenna
Industry Workflow for Lavalier Usage
Before the Shoot: Lavalier Test
- Check Wireless Range: Signal strength ("-40 dBm" is good, "-70 dBm" is weak)
- Transmitter Battery: Fully charge or insert a new battery
- Microphone Test: "Pop sound" into the capsule to check function
- Headphone Check: Sound mixer listens on headphones and confirms signal
During Fitting: Mounting on Actor
- Clothing Check: What outfit is the actor wearing? Where is the best hiding position?
- Marking: Mark the exact spot with tape or marker where the lavalier will sit
- Cable Routing: Hide under clothing, secure with tape
- Transmitter Pocket: Securely in the back pocket of trousers or on a hip belt
- Live Check: Actor speaks a few lines, sound mixer confirms: "Good signal, sounds good"
Between Takes: Adjustments
- Too muffled? → Lavalier a few cm closer to the mouth
- Too much clothing noise? → Secure with more tape or move to a different spot
- Radio interference? → Reposition antenna or switch to a different frequency
After the Shoot: Backup Recording
The sound mixer saves the lavalier signal on a separate channel as a backup. In editing, the sound editor will later choose: boom mic or lavalier, depending on the recording quality.
Practical Checklist for Lavalier Operation
- [ ] Wireless transmitter is fully charged or has a new battery
- [ ] Receiver shows stable signal strength (-30 to -50 dBm ideal)
- [ ] Lavalier microphone is positioned 10-20 cm below the chin
- [ ] Cable is hidden under clothing and secured with tape
- [ ] Transmitter is securely in the trouser pocket, not loose
- [ ] Windscreen is on the microphone
- [ ] Perform live voice test ("Testing 1-2-3")
- [ ] Sound mixer confirms level and sound quality via headphones
- [ ] Record lavalier signal separately (as backup alongside boom)
- [ ] For costume changes: reposition and test lavalier
- [ ] After several hours: check battery status
Lavalier vs. Boom Mic: When to Use Which?
| Scenario | Best Choice | Reason |
|---|
| Static Dialogue Scene | Boom Mic | Better sound quality, less clothing noise |
| Action Sequence with Running | Lavalier | Boom cannot follow, lavalier provides consistent levels |
| Extreme Close-Up | Lavalier | Boom would be in frame |
| Outdoor Shooting with Wind | Boom Mic | Better wind protection possible |
| Tight Interior Spaces | Boom Mic | Better control over room reflections |
| Scene Start with Multiple Actors | Both (Mono) | Boom for wide sound, lavalier as backup |
Summary
The lavalier microphone is an indispensable tool in professional audio workflows, but with compromises:
Advantages:
- Consistent, loud dialogue levels
- Independent of boom position
- Allows for tight camera framing
- Reliable in action scenes
Disadvantages:
- Clothing noise ("Rustling")
- Proximity effect and bass boom
- Setup time for mounting
- Potential for radio interference
Best practice: Always use both systems (boom + lavalier). This gives the sound mixer maximum flexibility and security against bad recordings in post-production.